
Welcome back everyone. You didn’t hear from me in a long time. But now I have something to share with you. It’s time to unveil RabbitExpress.
During the last years I was working on different projects, most of them involving non disclosure agreements.
That’s why it took some time for me to reappear. During that time I did some side development that got obsoleted by the European parliament when accepting the Directive on Copyright in the Digital Single Market.
When looking over the accumulated repositories a small little class caught my attention. It was not much but a neat little thing.
I started to ask around if it’s ok to LGPL the code. The feedback was good. So I started to extract the code into a fresh repository. The GitHub repository was born.
Starting an Open Source project
Starting an open source project is very straight forward. GitHub offers great support to get you started. And even offers you help to select the right license for your requirements.
The next thing after setting up the repository is getting a build setup. One of the easier ways to get going for your .Net project is using a service like appveyor.com. Setting up the build is very straight forward and happens in a nice integrate user interface. You select a repository from your linked GitHub account adjust some settings and the build is working.
After being able to build you need to be able to deploy the library. When using the .Net ecosystem there is only one good solution for dependency management and publishing.
Let me introduce nuget. Just create an account and you’re good to go. For the integration with appveyor add an API Key on nuget.org and use it during your build. After a short validation your new package will show up in the package feed.
Great it’s there let’s use it
After all that setup is done you figure out that you need to setup some documentation. GitHub even offers a quick solution for that. Activating GitHub pages on the repository will create a public facing website using Jekyll. There is a set of ready to use themes defined. And your README.md file will be automatically available.
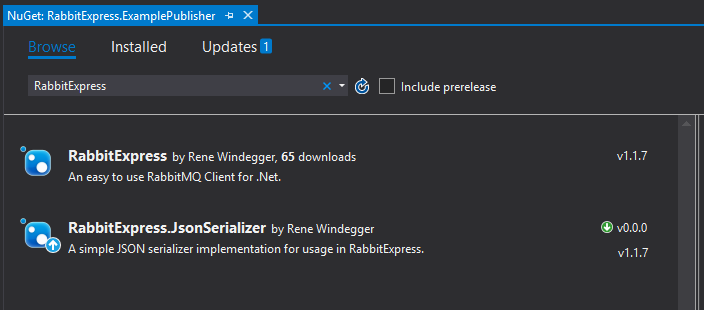
So with the documentation in place let’s take a look at how to a reference can be added to RabbitExpress now. Using Visual Studio you can just use the Manage NuGet Packages menu entry. Searching for RabbitExpress will yield the result on the right.
When you use the Visual Studio window simply add the reference to RabbitExpress.JsonSerializer to your project. This will take care of all the dependencies required by RabbitExpress and allows you to use the QueueClient in your project.
Using RabbitExpress to talk with RabbitMQ
Integration is very easy. The Examples offer a great start for your use. All you need is an instance of RabbitMQ ready.
Using the RabbitExpress publisher
The Publisher just makes use of the Publish method.
As you can see the code is pretty straight forward. Observe the call to Publish in Line 60. The object that is passed is just a plain object. The queue name is specified using the Queues enumeration and prevents typos.
Implementing a worker using RabbitExpress
A worker is a simple program that only has one concrete task. In our example the task of the worker is to output messages that it receives from the queue. The example randomly fails and adds the message back into the queue, so another worker can try to process the message or after some time the error is recovered and the current worker receives the message again. When the worker receives an empty message it just rejects the message without adding it to the queue again. Let’s take a look at the example.
This example requires a little more knowledge. It is using the Methods of the QueuedMessage to signal failure or success. And when it receives the exit message, the loop will end.
You can see the different forms of rejection used in Line 63 and Line 82. In Line 73 you can see the call to Acknowledge.
What is next
The next thing to do is adding more serializers to the project. Serializers allow to pass data around in messages. At the moment you will only find a JSON serializer.
Implementing your own serializer is very easy. Just implement the IExpressSerializer interface. Only two methods need your attention to implement the interface.
Over the next couple of weeks there will show up different serializers. A Protobuf serializer is already in development and development on a msgpack serializer will begin shortly. Do you have other ideas, let me know in the comments below. When multiple serializers are available adoption rate increases and with higher adoption rate new ideas spring up on it’s own.
Conclusion
Starting an open source project is quite easy. There is a lot of infrastructure already in place and starting the usage is free of charge. After the initial setup there are multiple channels your open source project gets listed. nuget became the predominant channel for package distribution in .Net. No the library is out in the wild. I’m looking forward to feedback. The project the class was extracted from is already using the new NuGet package. When you use the library and end up here drop a line in the comments. When encounter an issues, make sure to create an issue on GitHub, also when you think you can contribute. Feel free to create Pull Requests on GitHub.
With all that said. I hope you enjoyed the post. Maybe I have another post sooner than the last time.
This post is also available in: German
Comments (0)